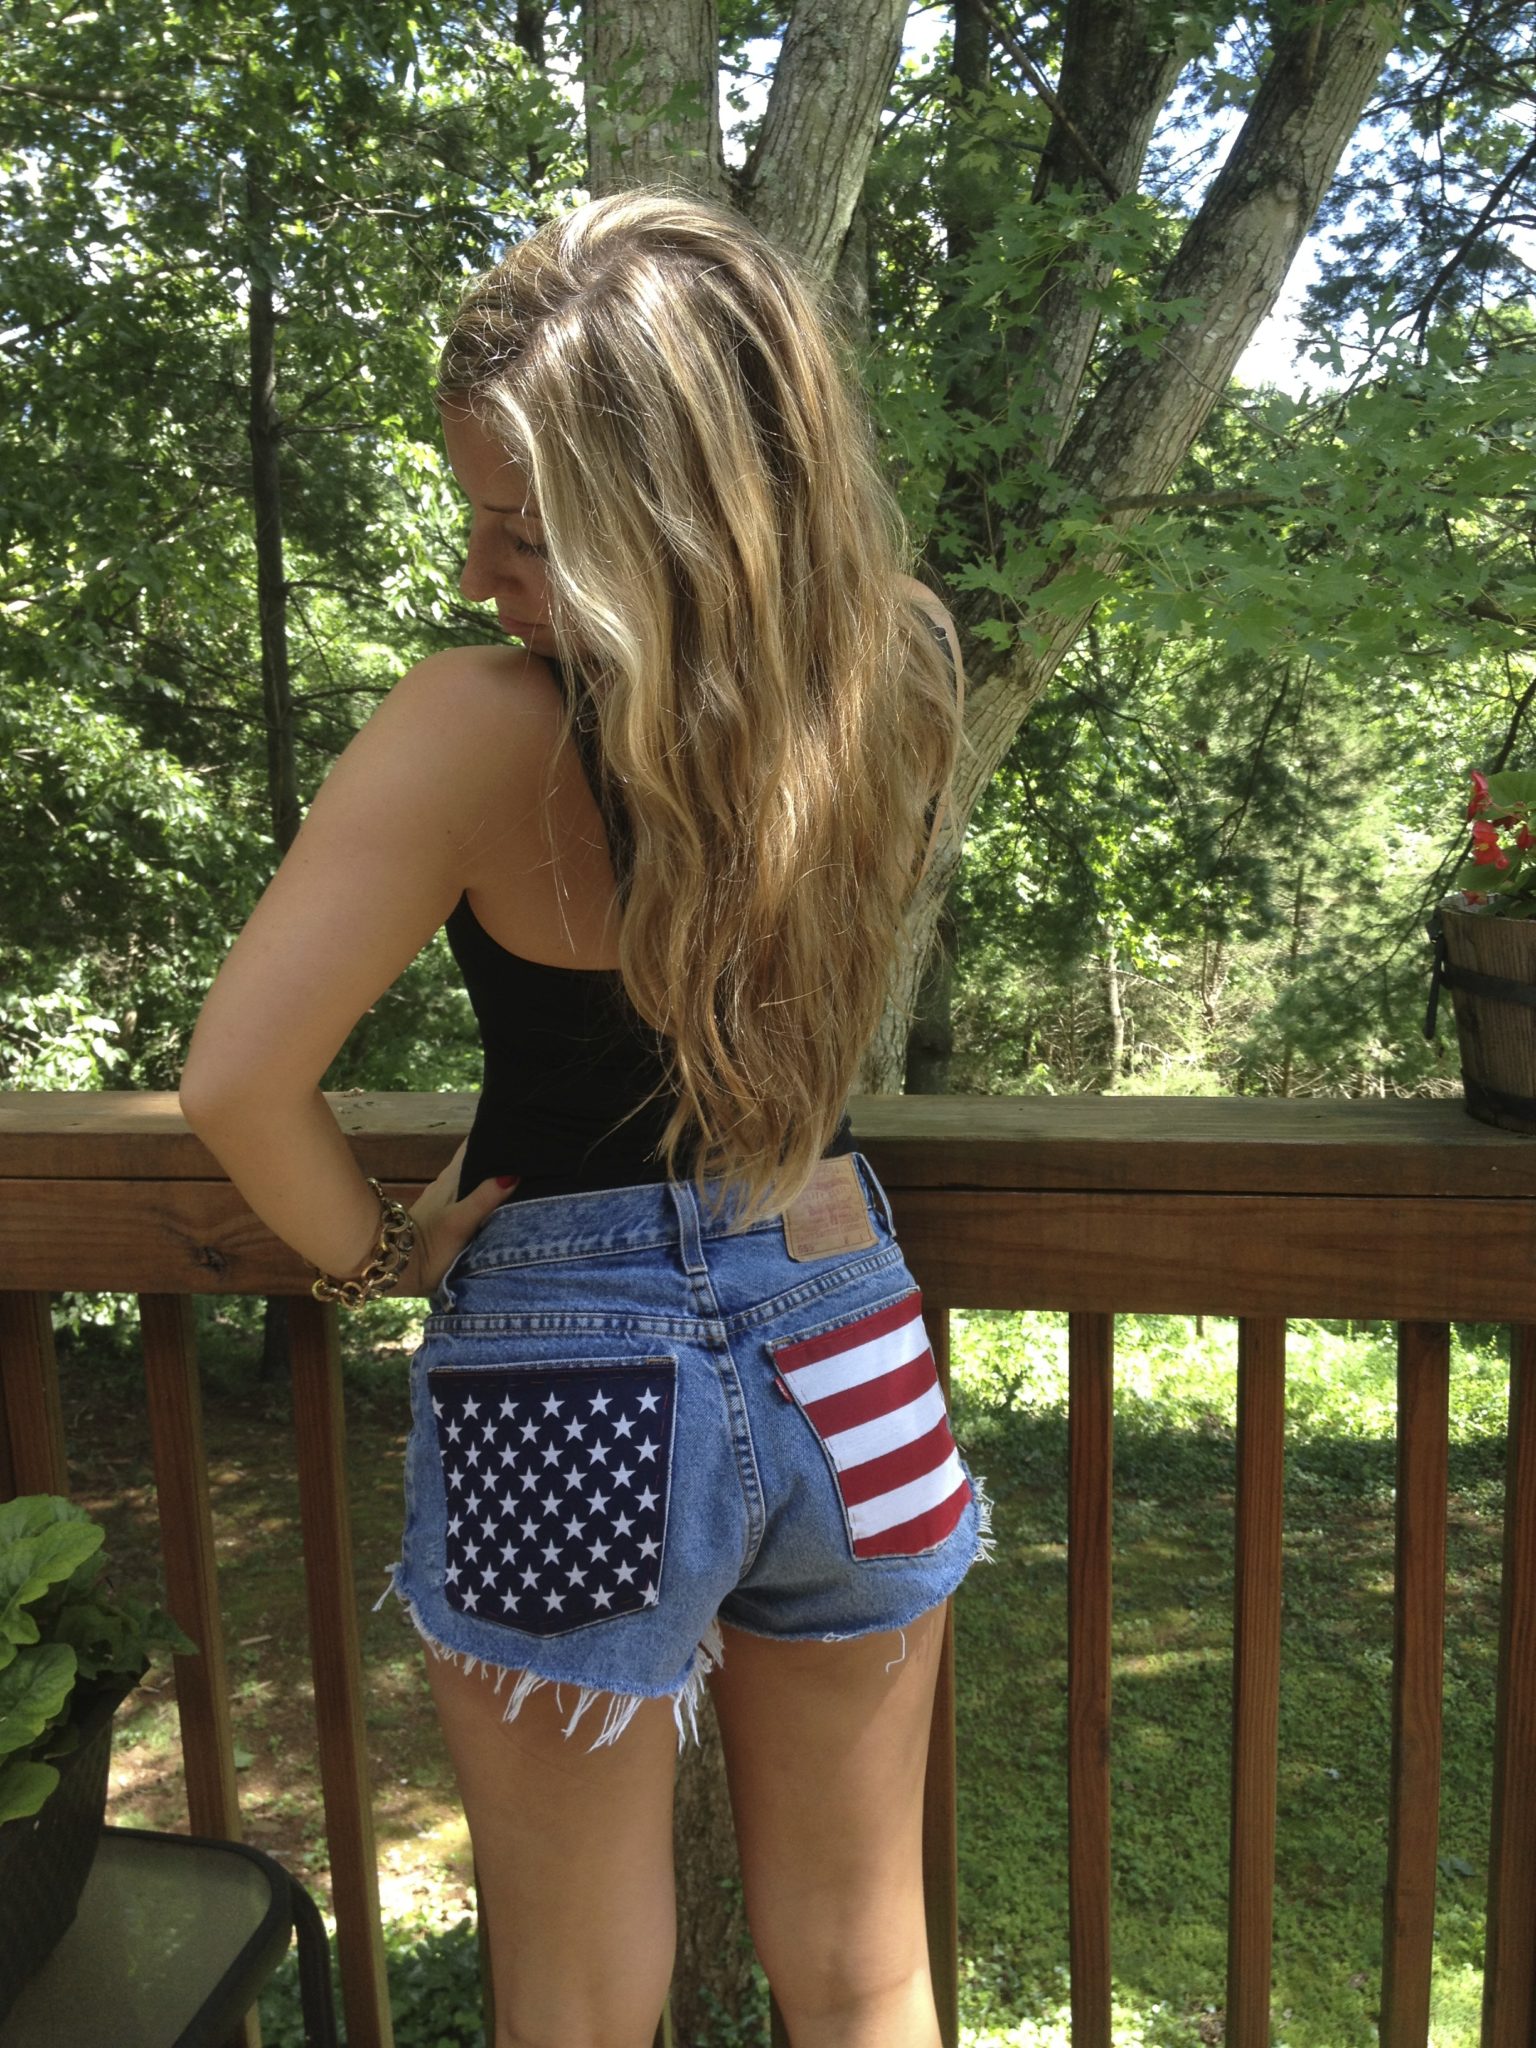

Looking for the perfect denim cutoffs to wear on the 4th of July/cheer on USA soccer in the World Cup/just to live in this summer? Don’t buy it, DIY it! (I’m the most annoying person ever). Cheesiness aside, American flag shorts are all over the place on Pinterest, Etsy, and at all our favorite stores. The problem is, the cute ones can get a little pricey and the more affordable ones are fugly. Classic.
After countless hours on Etsy trying to decide which ones I wanted, I decided that these were probably v easy to make. I’m kind of a professional at finding 90’s mom jeans vintage jorts at thrift stores, so I went to Goodwill and found a great high waisted pair, cut up a cheap flag (sorry America), and sewed them on. The whole process didn’t take more than a couple hours and I spent about $10 total. Sounds pretty doable, right?
I made these shorts last summer pre-TK&PD, so unfortunately I didn’t take intricate step-by-step photos of the crafting process. HOWEVER, I do have several pictures of how cute they are — and I’ll give you foolproof directions to create your own pair. If I can do this, anyone can.
How to Make American Flag Cutoffs:
- Find some cute vintage shorts/jeans at your local thrift shop. Bonus points for Levis. If yours are awkward mom length like mine were, use some good scissors to cut them to the right length. If you don’t feel confident in your Daisy Duke making skillz, follow this tutorial from my frenemy, Lauren Conrad. Can’t find any good shorts? Use your favorite pair and just cut off the flag patches when you’re over it.
- Wash & dry your shorts FIRST to get them all frayed and sassy. You can even use a little razor blade to distress the shorts to your liking — I made a couple subtle tears and frayed up the pockets a bit.
- Buy a cheap American flag at CVS/Michaels/a fabric store/literally wherever you can find one. This is the part I struggled with. I searched high and low for weeks, then finally just used one of those little fabric flags on a stick that you can wave (is there a better name for those??) and it worked out perfectly.
- Lay the flag on top of your shorts and use a pencil to outline the edges of the pockets. Make sure you’re completely in the stars section for the left pocket and completely in the stripes section for the right pocket.
- Use sharp scissors to cut out the patches along the pencil lines you just made.
- Flip the patches over so the pencil lines are against the shorts. Use a few pins to secure the patches in place right on top of the pockets.
- Grab a needle and thread — I used red thread to make it stand out and then did kind of exaggerated stitches since it was going to be conspicuous anyway.
- Sew the patches onto the pockets of your cutoffs. Make sure you don’t sew the pockets closed unless you dgaf.
- If you accidentally cut the patches too big or need to touch up an uneven cutting job (me), you can always trim/clean up the edges with some little scissors.
- Viola! You are now the most patriotic girl at the party.
Not only do you now have the cutest shorts evaaa, you also get to spend your money on more important things, like alcohol. Best of all, when people compliment them (which they will), you get to say you made them (insert hair flip emoji here). Eat your heart out, Etsy.

Happy crafting!
xx Chloe
Still not sure about your Independence Day outfit? Stay tuned…